What is a blackout tattoo? Here’s why you should think twice before getting one – Screen Shot
Deep Dives Level Up Newsletters Saved Articles Challenges

What is a blackout tattoo? Here’s why you should think twice before getting one

Whether it’s an ‘ITS COMING HOME’ tattoo plastered on your forearm or a photorealistic tattoo of your ex’s face spread across your chest, we’ve all made mistakes. Nothing can compare to that stomach-drop sensation: the sobering realisation of what you’ve done to your skin, scrabbling for the number of your local tattoo removal clinic. What if, instead of lasering the ink off, you just cover the piece with even more ink?

Although cover-ups aren’t the only reason people opt for getting a blackout tattoo, they make up a significant portion of people who have them. However, although it might seem like the easy option, there are reasons why you should think twice before committing to one.

View this post on Instagram

A post shared by 彫狼 Lupo Horiōkami (@horiokami)

What is a blackout tattoo?

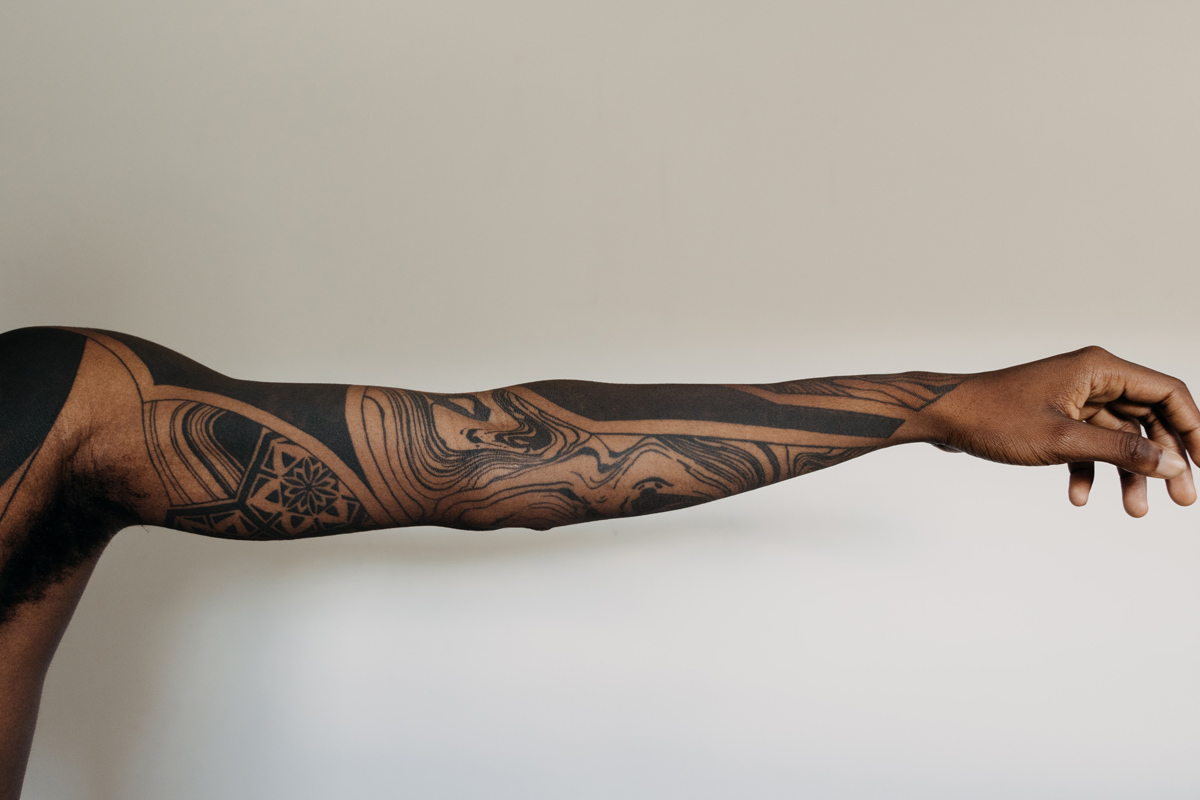
A blackout tattoo essentially speaks for itself: a form of tattooing which typically covers a section of the body—often the arms or legs—in solid, opaque black ink. The design is deliberately bold, leaving a large chunk of the body in nothing but black ink. Think of it as using the fill paint bucket on MS paint, but instead of filling in a square, you’re filling in a section of your body.

Opting for a blackout tattoo comes with its fair share of costs (and pain). Often, committing to a blackout tattoo session can be time-consuming—the larger the area being tattooed, the more sittings and needles are needed. Also, as blackout tattoos are designed to be completely solid, a tattoo artist would most likely have to go over spots multiple times to ensure an even pigment distribution. If your artist makes a mistake and misses the smallest section of skin it’ll throw off the aesthetic of your entire tattoo. No pressure…

So, if you are set on getting a blackout piece, best choose a reliable and experienced tattooist for the job. According to BYRDIE, you should expect to pay between $100 to $300 per hour (that’s around £70 to £115) for a blackwork piece to be done. That adds up when you take into account that blackout tattooing often takes multiple hours to complete (depending on the size of the piece you’ve requested).

Why you should think twice...

Okay, so you’ve come to terms with the reality a blackout tattoo will have on both your pain receptors and your wallet—but what about the social and cultural implications? While the idea of a blackwork tattoo being offensive is very much up for debate, many believe the practice is a form of cultural appropriation.

Consider this: a white man pays money to darken his skin for social gain (to look cool to his friends, to get more matches, for Instagram clout… whatever the reason). According to the cultural theorist George Lipsitz, this is textbook cultural appropriation: “When an element of culture is adopted from a marginalised group without respect for its cultural meaning or significance or within the purpose of exploiting the culture for economic or social gain.”

Tattoo artist ​​Elisheba Mrozik also believes blackout tattoos can be a form of cultural appropriation. She told BYRDIE, “It is also [insensitive] to think that blacking out your skin as a white person is a ‘trendy’ thing when, for centuries, being dark-skinned in this nation has been a curse and cause for pain, strife, economic slavery and injustice, stolen wealth and legacies, ruinous incarceration rates, violent death, and dreams deferred.”

It’s hard to ignore the fact that choosing to darken a large section of your skin as a non-black person could be problematic. People of colour face daily discrimination because of their complexion. Even unknowingly, by choosing to get a blackout tattoo you could be maintaining and reinforcing that institutional racism. As Mrozik highlights, “Ignorance of something does not excuse people from its consequences.”

What is a stick and poke tattoo? Here’s everything you need to know

Punk is all about being anti-establishment, anti-conformist and, basically, doing your own thing in your own way. It’s hard to imagine the punk movement without tattoos. Tattoos are the bedrock of punk culture and, arguably, there’s nothing more punk than the do-it-yourself tattooing technique, stick and poke. 

This doesn’t mean to say that tattoos are limited to punk culture. In fact, take a look back in history: tattoo culture has been entrenched within the traditions of countless cultures across the globe—transcending the confines of ethic and societal boundaries. From underground Russian prison tattoos to traditional Japanese Tebtori, all the way up to the present day Western backpackers getting their elephant tattoo on their ‘life-changing’ gap year in Thailand.

And despite my parents’ disgust at the culture—tattoos have always been around, and aren’t going anywhere soon. For this article, however, we’ll focus on stick-and-pokes, a style of hand-poked tattooing that transcends the need for a gun or studio. Here’s everything you need to know about the DIY tattooing technique that’s rapidly growing in popularity.

Voir cette publication sur Instagram

Une publication partagée par @taticompton

What is a stick and poke tattoo?

The history of handmade tattoos is extensive and dates back over 5,000 years. Contrary to typical tattoos, stick and pokes don’t require any electrical tools and little experience of traditional tattooing. Theoretically, this makes them an affordable, accessible activity to do from the comfort of your own home. This is likely the reason why stick and poke tattooing saw a boom during the COVID-19 pandemic—when tattoo parlours are shut, people look for alternative ways to make art on their skin.

Sounds great, right? It’s making me tempted to pick up a needle right now and dot something on my skin, but where do I start? Well, the most common method of stick and poke tattooing involves attaching a tattoo-grad needle to a holding contraption, which allows ink to be easily applied to the skin. The style lends itself particularly to intricate dot work or trippy geometric patterns. However, the technique is by no means limited to these styles, as its DIY nature means you can let your creative juices flow.

How to do a stick and poke tattoo

Now, as tempting as it might be to rush into stick and poke tattooing, it’s important to make sure you have taken the necessary steps to assure you can make your art safely—it is forever, after all. The most crucial step is to ensure you have the correct toolkit. It goes without saying, make sure you have the correct tattoo needles and ink before undertaking your stick and poke journey. 

More importantly, ensure you have the correct medical supplies to counteract the inevitable minor injuries that come with tattooing. It’s crucial that you invest in the right aftercare supplies, which will help your tattoo heal nicely. Yeah, it might not be as punk as getting it done on a random night using just a needle and ink but trust me, when your tattoo recovers properly and doesn’t devolve into an infected messy ink-blob—you’ll thank me later.

The process: step-by-step

Although stick and poke is a relatively simple process, it’s important to make sure you’re prepared both mentally and physically for the task. It’s easy to forget but your skin is in fact an organ (and the largest in the body), so be prepared for your immune system to freak out a bit when injecting your body with ink. To make sure the process goes as smoothly as possible, ensure you’re hydrated and abstain from any alcohol and drug use—in other words, I’d avoid getting your tat the morning after your Friday night bender. If you can’t say no to the sesh and end up drinking the night before, just keep in mind that alcohol thins your blood, meaning your tattoo will probably bleed more than normal. The same applies to getting a piercing.

First, start out by laying down a clean, disinfected workspace. If necessary, shave the area you plan to ink with a razor and put on some latex gloves. Then, using an alcoholic pad, clean the area you wish to tattoo. To avoid ending up on an ‘ink-shaming’ Facebook group, I strongly advise planning out your design using a stencil. Once the stencil gel has dried onto your skin, you’re almost ready to get started.

Place your desired ink into a sterile container, I personally prefer the classic black ink style but don’t be scared to experiment with different colours. It is your body after all—don’t let a stranger on the internet tell you how you want your body to look. Start by dipping the desired sized needle into the ink so to coat it above the cluster of needle tips, this will create an ink reserve, allowing you to ink your skin with less frequent dips in the ink.

Exercise this part with extreme caution: start by slowly and gently pressing the needle tip into the skin, allowing the ink to be deposited within the skin’s layers. Make sure not to press the needle too deeply, you want the needle to make the layers of skin but not go completely through the skin itself. It’s best to go steady with this, start out lightly and assess from there whether the ink stays in your skin once you wipe the excess away from the surface. Don’t be alarmed if there’s a noticeable tug as you take the needle out, that’s normal. A little bit of blood is normal too, but only minimal, your skin will also ooze a translucent plasma, similar to when you have a minor cut or scrape.

Voir cette publication sur Instagram

Une publication partagée par seanfromtexas (@seanfromtexas)

Repeat these steps at your own pace by following the stencilled line—it’s better to do a good job slowly than permanently mess up by rushing. It’s a strange process at first, especially if you’ve never had a tattoo before, but don’t worry it gets easier with practice. It’s also important to listen to your body and take a break if need be—the ink will always be there to work with once you’re ready to start again.

Once you’ve worked your way around the stencil, you should start to see your desired artwork take shape—exciting, right? Once you’ve finished, wipe the tattooed area with warm soapy water and then an alcoholic pad, this part might sting a little but it beats a nasty infection. Finally, apply either a soaker pad or a waterproof tattoo aftercare bandage to the area. After five hours or so, you can take off the soaker pad and thoroughly wash the area again with warm soapy water. If you’ve gone for a waterproof bandage, it will come off by itself after your second or third shower. Make sure to apply aftercare balm to ensure your tattoo recovers successfully. Avoid scented creams which contain alcohol and might irritate your skin and try to go for a dry skin-oriented product. My personal recommendation would be Palmer’s Cocoa Butter Formula.

And voilà—just like that, you’re all done! Now you’ve joined the thousands, if not millions, of people who have taken body art, quite literally, into their own hands. Whether it’s a meaningful design or just an inside joke you wanted to immortalise, the important thing is that you’ve rightfully exercised your right to do whatever the hell you want with your body. I hope this article has helped you mark your skin in a safe and responsible way. Happy inking!